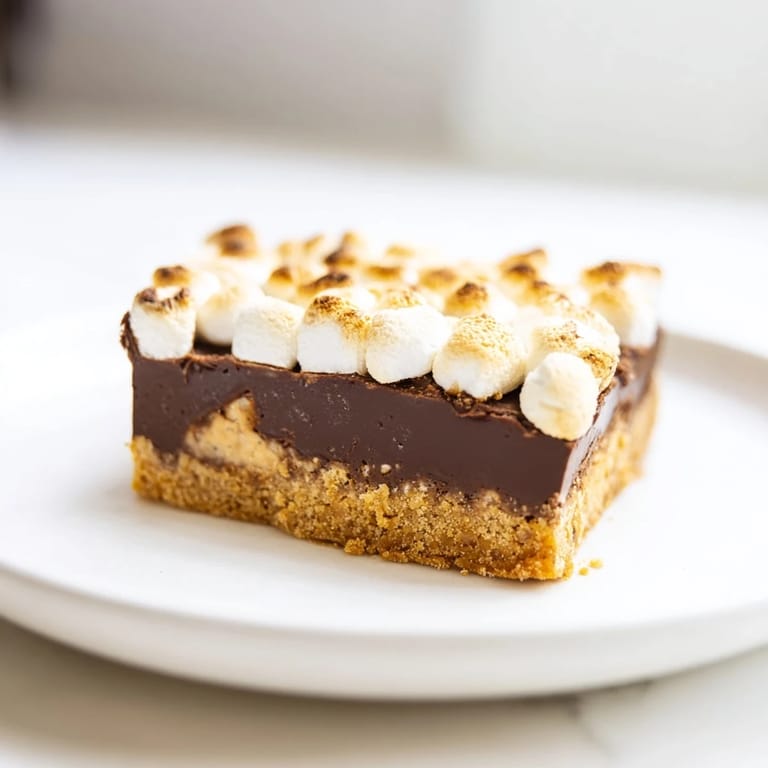
 Pin it
 There's something about the smell of graham crackers toasting that instantly transports me back to sitting on a wooden bench at my cousin's cabin, watching smoke curl up from the fire pit on a cool September evening. Someone handed me a s'more that night, and I bit into it expecting the usual mess—but somehow every layer was perfectly melted together, like it had been orchestrated by someone who actually understood what they were doing. Years later, I realized I could recreate that magic in my kitchen, without the campfire smoke in my hair or the inevitable chocolate on my jeans. These bars capture every nostalgic note of that memory in a form that's somehow even better: no burnt marshmallows, no graham crackers that crumble before you can assemble them, just pure, gooey satisfaction in neat little squares.
I made these for the first time during a snow day last January when my neighbor knocked on the door asking if I had any sugar to borrow. Instead of just handing her a cup, I found myself asking if she wanted to stay while I tested a new recipe, and suddenly we were both standing in my kitchen with flour somehow on our shoulders, laughing at how serious we'd become about getting the marshmallow toasting just right. By the time we pulled the pan out of the oven, the whole block probably smelled like chocolate and caramelized sugar, and she left with half the batch and a promise to bring her teenage kids over next time.
Ingredients
- Graham cracker crumbs (1 1/2 cups): The foundation of everything—use full sheets crushed by hand or pulse them gently in a food processor until you get varied textures, not fine sand.
- Unsalted butter, melted (1/2 cup): This is your binding agent, and warm butter coats everything evenly without making the crust greasy.
- Granulated sugar (1/4 cup): Just enough sweetness to enhance the graham's flavor without making the crust cloyingly sugary.
- Semi-sweet chocolate chips (1 1/2 cups): The bridge between salty and sweet—don't skip the quality here because chocolate is the star player in this dessert.
- Mini marshmallows (3 cups): Their size matters; minis toast faster and more evenly than full-size, creating those golden peaks you're after.
Tired of Takeout? 🥡
Get 10 meals you can make faster than delivery arrives. Seriously.
One email. No spam. Unsubscribe anytime.
Instructions
- Set up and preheat:
- Get your 8x8-inch pan lined with parchment, leaving extra hanging over the sides so you can lift the whole thing out later without broken edges or stuck bits. Preheat your oven to 350°F while you gather the rest.
- Build the crust:
- Mix graham crumbs, melted butter, and sugar until it feels like damp sand—you want every crumb coated but not soggy. Press it firmly into the bottom of your pan, using the bottom of a measuring cup to make it even and compact.
- Toast the foundation:
- Bake for exactly 8 minutes; you're just setting the crust, not browning it heavily. It should smell like toasted grain when you pull it out.
- Melt the chocolate:
- Sprinkle chocolate chips over the warm crust immediately, then return to the oven for 2 minutes. The residual heat will soften them without burning—you want them pliable, not liquid.
- Spread with intention:
- Use a spatula to gently spread the softened chocolate into an even layer, working quickly while it's warm. Don't overthink it; any rustic swirls look intentional and taste delicious.
- Top with marshmallows:
- Scatter mini marshmallows over the chocolate and press them down just enough so they nestle in—you want them connected but not submerged.
- Toast until golden:
- Bake for 10 to 12 minutes, watching through the oven window as the marshmallows puff and turn golden on top. You'll know it's done when they're light brown, almost crispy at the peaks.
- Cool completely:
- Let the bars sit in the pan until they're room temperature, then chill in the fridge for 1 hour so the chocolate sets and slicing becomes clean instead of a gooey catastrophe.
- Slice and serve:
- Lift the whole thing out using the parchment overhang, place on a cutting board, and slice into 16 neat squares with a sharp knife (warm it under hot water between cuts if the chocolate resists).
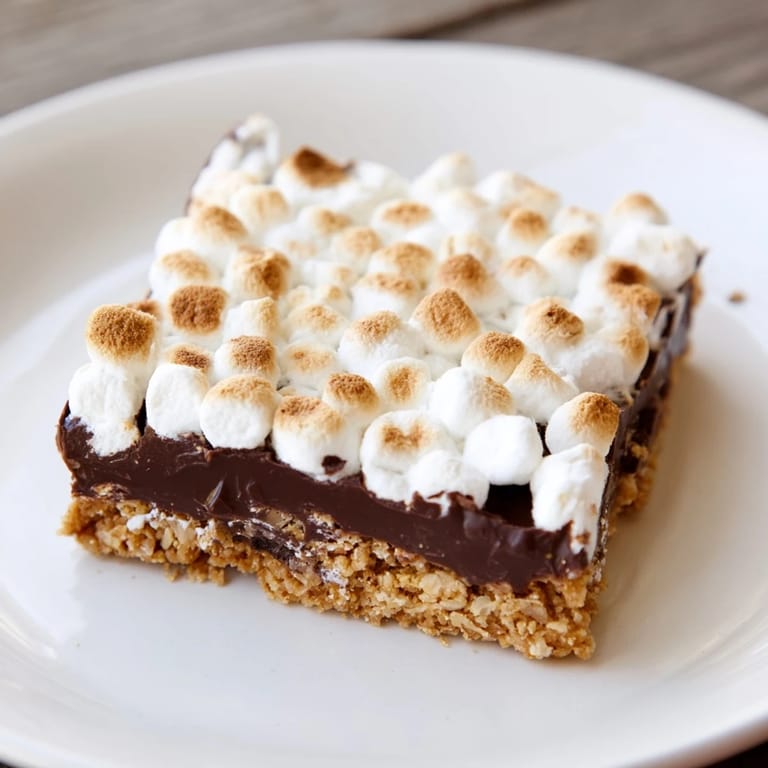 Pin it
 What makes these bars special isn't just their flavor, though that's obviously the whole point—it's the way they somehow sparked a conversation with my mom about all the s'mores disasters we'd laughed through over the years, and how this version finally got it right. She asked for the recipe that day, and now they show up at every family gathering, usually in a Tupperware container with a note that says "please don't ask why they're so good, just eat them."
Why the Chemistry Works
The magic of s'mores bars lies in creating all three layers at once instead of assembling them by hand over a fire. The graham cracker base gets just enough time in the oven to develop a subtle toasted flavor without hardening, which means it stays crispy underneath but absorbs moisture from the chocolate and marshmallow above rather than becoming tough. When chocolate meets warm graham, it softens into a binding agent that holds everything together; when marshmallows bake on top, they toast from the outside in, creating a light, crispy exterior while staying pillowy within. The parchment paper becomes essential here because the residual heat and steam mean the whole thing needs to cool undisturbed, allowing the chocolate to set back up and create actual structural integrity instead of just a pile of melted candy.
Timing and Temperature Variations
Every oven has its own personality, and marshmallows are sensitive students—some ovens run hot and will toast them golden in 9 minutes, while others need the full 12. The first time you make these, position yourself near the oven around the 10-minute mark and actually watch through the glass rather than trusting a timer blindly. If your oven runs particularly hot, you might bake the crust for only 6 minutes instead of 8, and reduce the final marshmallow bake to 9 or 10 minutes. Conversely, if you have a slower oven, give the crust closer to 9 minutes and extend the marshmallow time slightly. The goal is golden-brown marshmallows with darkened peaks—if they turn from gold to dark tan while you're distracted, you've crossed the line into bitter.
Customization Without Losing the Soul
The base recipe is deliberately simple so you can play with it without breaking what makes it work. A pinch of sea salt in the graham crumb mixture elevates the whole thing by cutting through sweetness—use about 1/4 teaspoon and taste as you go. Dark chocolate chips create a more grown-up version, while milk chocolate delivers pure nostalgia and sweetness, so choose based on your mood. If you want to swap graham crackers for digestive biscuits, they'll work beautifully and add a slightly earthier flavor. One warning though: don't get creative with the marshmallow layer itself—store-bought mini marshmallows exist in that sweet spot of size and structure that makes them toast evenly, and homemade or large marshmallows won't cooperate the same way.
- Sea salt, dark chocolate, or digestive biscuits all elevate the recipe without requiring technique changes.
- Toast the marshmallows with your eyes on them, not your phone.
- Serve these warm for maximum gooeyness, but they're still delicious at room temperature the next day.
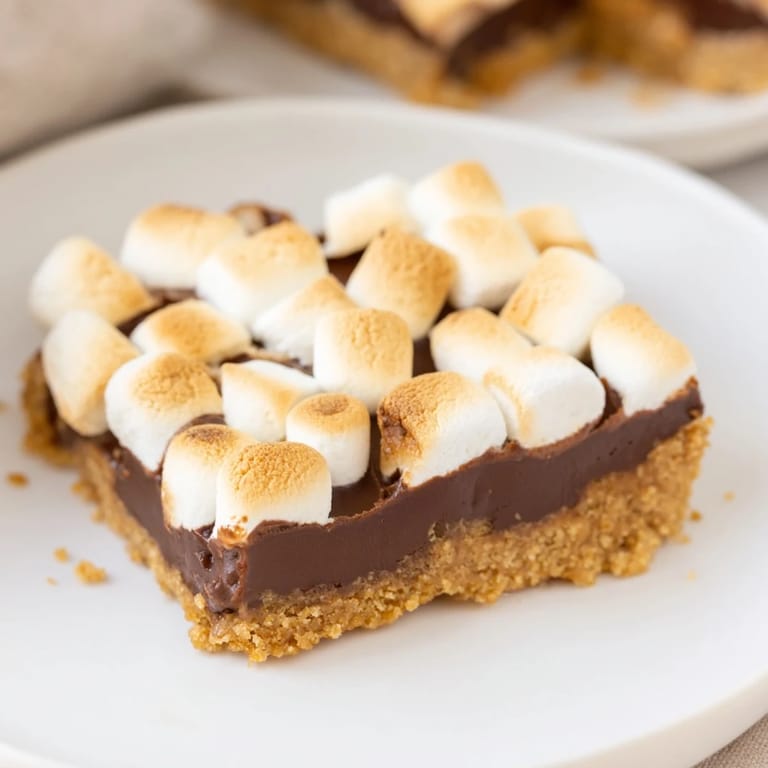 Pin it
 These bars prove that the best recipes often aren't about complexity or fancy ingredients, but about understanding how simple things work together. Every time someone bites into one, I watch their face light up with that same recognition I felt at my cousin's cabin—that unexpected moment when everything tastes exactly like it should.
Recipe Q&A
- → What type of chocolate works best?
Semi-sweet chocolate chips melt well and balance sweetness, but milk chocolate can be used for a sweeter touch.
- → How do I prevent marshmallows from burning?
Bake until marshmallows are golden and toasted; watch closely in the last few minutes to avoid over-browning.
- → Can I substitute the graham cracker crumbs?
Yes, digestive biscuits or similar crackers can replace graham crackers for a different flavor.
- → How should I store the bars?
Keep them chilled in an airtight container to maintain texture and freshness for several days.
- → Is chilling necessary before slicing?
Chilling the bars for about an hour helps achieve clean slices and firms up the gooey layers.