 Pin it
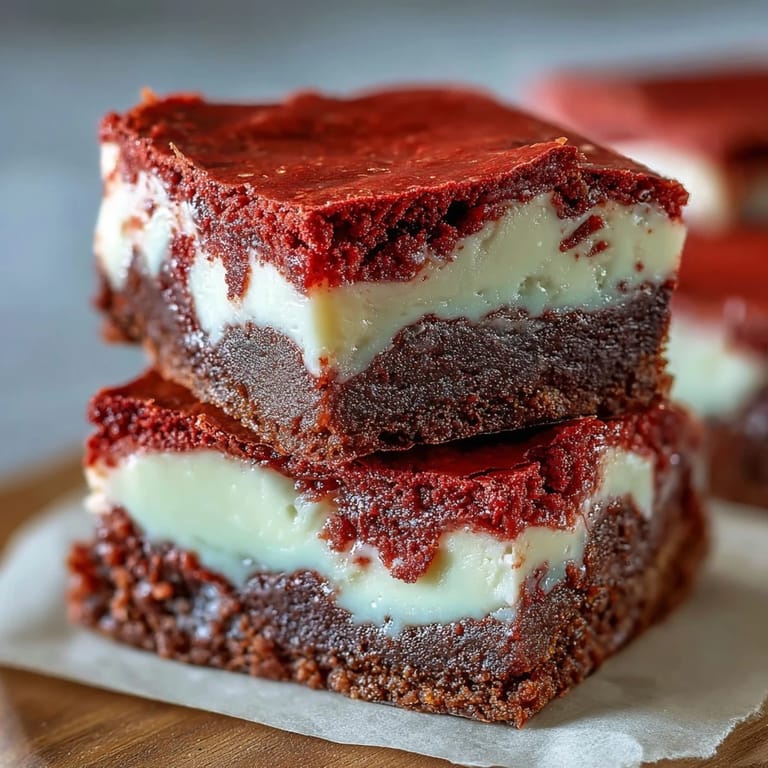
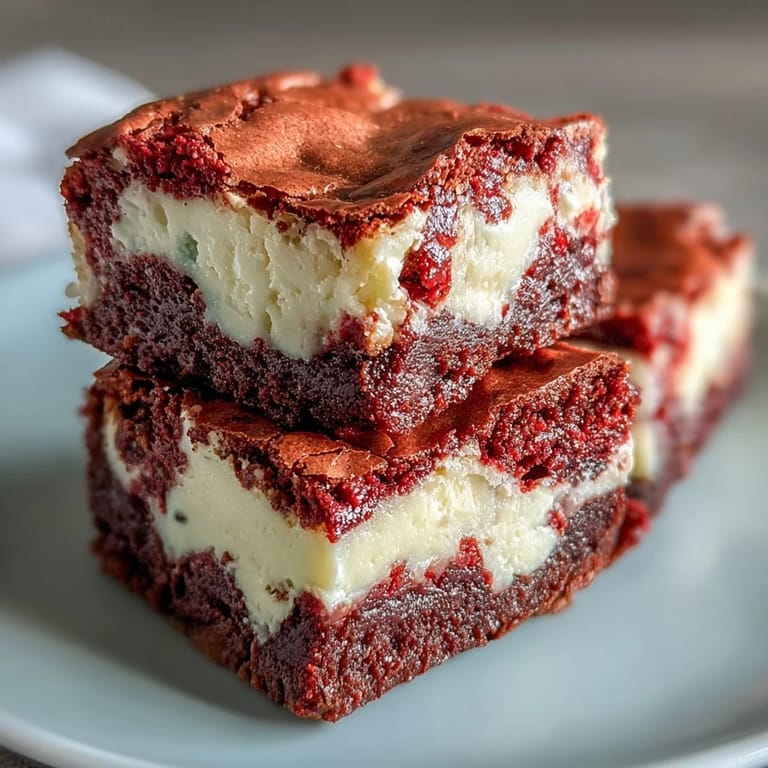
 The oven timer buzzed just as snow started falling outside, and I pulled out my first attempt at layered brownies. They were lopsided, the swirl looked more like a blob, but when I cut into them, the contrast between fudgy red velvet and tangy cheesecake made me forget every imperfection. My neighbor tasted one through the fence later that afternoon and asked if I was opening a bakery. I wasn't, but I did make three more batches that winter.
I brought these to a potluck once, still warm in the pan, and watched as people came back for seconds before touching the main course. Someone asked if they were from a bakery, and I just smiled. The truth is, they come together faster than most cakes, but nobody needs to know that. They became my go-to whenever I wanted to look impressive without the stress.
Ingredients
- Unsalted butter: Melted butter creates that dense, fudgy texture you want in a brownie, and using unsalted lets you control the saltiness perfectly.
- Granulated sugar: This sweetens both layers and helps create the shiny, crackly top that makes brownies so irresistible.
- Eggs: Room temperature eggs blend more smoothly into the batter and give the cheesecake layer its silky consistency.
- Vanilla extract: A little vanilla in both layers ties the flavors together and makes your kitchen smell like a bakery.
- Red food coloring: Gel coloring gives you that vibrant red without thinning the batter, though liquid works if that is what you have on hand.
- All-purpose flour: Just enough to give structure without making the brownies cakey or dry.
- Unsweetened cocoa powder: This adds the subtle chocolate backbone that makes red velvet taste like more than just colored cake.
- Cream cheese: Softened cream cheese is non-negotiable for a lump-free cheesecake layer that spreads like a dream.
Tired of Takeout? 🥡
Get 10 meals you can make faster than delivery arrives. Seriously.
One email. No spam. Unsubscribe anytime.
Instructions
- Get the oven ready:
- Preheat to 175°C and line your pan with parchment, letting the edges hang over like little handles. This makes lifting the brownies out so much easier once they are cool.
- Mix the red velvet base:
- Whisk melted butter and sugar until they look glossy, then stir in eggs, vanilla, and that gorgeous red coloring until the batter turns vivid and smooth.
- Fold in the dry ingredients:
- Sift flour, cocoa, and salt over the wet mixture, then fold gently just until no streaks remain. Overmixing will make them tough instead of fudgy.
- Reserve some batter:
- Scoop out a quarter cup of red velvet batter into a small bowl and set it aside. Spread the rest evenly across the bottom of your prepared pan.
- Whip up the cheesecake layer:
- Beat softened cream cheese until fluffy, then add sugar, egg, and vanilla, mixing until the mixture is silky and there are no lumps hiding in the corners of the bowl.
- Layer and swirl:
- Pour cheesecake over the red velvet base and smooth it out, then drop spoonfuls of reserved red batter on top and drag a knife through to create those beautiful marbled swirls.
- Bake until just set:
- Slide the pan into the oven for 35 minutes, watching for the center to look barely jiggly and a toothpick to come out with moist crumbs. Overbaking dries them out fast.
- Chill completely:
- Let them cool on a rack, then refrigerate for at least two hours. Cold brownies slice cleanly and the cheesecake sets into creamy perfection.
 Pin it
 My sister once ate three of these in one sitting during a holiday party and declared them better than our aunt's famous fudge. That started a friendly competition that still comes up every December. I never told her how simple they actually are to make, and I probably never will. Some secrets are worth keeping.
Storing and Serving
These brownies taste even better the next day after the flavors have had time to settle and deepen in the fridge. I keep mine in an airtight container layered between parchment paper, and they stay moist and fudgy for up to five days. If you are serving them at a party, let them sit at room temperature for about ten minutes so the cheesecake softens just slightly.
Making Them Your Own
I have stirred white chocolate chips into the red velvet batter before, and the pockets of melted chocolate make them even more decadent. A friend of mine swears by adding a handful of chopped pecans for crunch. You can also drizzle melted white chocolate over the top after they chill for a bakery-style finish that takes thirty seconds.
What to Watch For
The biggest mistake I made early on was opening the oven door too often to check on them, which caused the center to sink. Let them bake undisturbed, and trust that slight jiggle in the middle when you pull them out. If your swirls disappear into the cheesecake, your red velvet batter was too thin, so make sure you reserve enough and dollop it confidently on top.
- Use gel food coloring if you want that intense red without adding extra liquid to the batter.
- Line your pan well or these will stick, and parchment with overhang is your best friend.
- A sharp knife wiped clean between cuts gives you those picture-perfect squares everyone will admire.
 Pin it
 Every time I pull these out of the fridge and see those red and white swirls, I remember why I keep making them. They are the kind of dessert that turns a regular Tuesday into something worth celebrating.
Recipe Q&A
- → Can I use natural food coloring instead of artificial red dye?
Yes, you can use natural alternatives like beet powder or natural red food coloring, though the color may be less vibrant. You may need to adjust quantities for desired intensity.
- → Why do my brownies need to be refrigerated before cutting?
Refrigeration allows the cheesecake layer to set properly and firms up the entire dessert, making it much easier to cut clean, neat squares without crumbling.
- → Can I freeze these brownies for later?
Absolutely! Wrap individual squares in plastic wrap and store in an airtight container for up to 3 months. Thaw in the refrigerator overnight before serving.
- → How do I know when the brownies are perfectly baked?
The center should be just set with a slight jiggle, and a toothpick inserted should come out with a few moist crumbs—not wet batter. Avoid overbaking to maintain fudgy texture.
- → What's the best way to create beautiful swirls?
Dollop the reserved red velvet batter evenly across the cheesecake layer, then use a knife or skewer to gently drag through both layers in figure-eight or circular motions.
- → Can I make these in a different pan size?
Yes, but adjust baking time accordingly. A 9x13-inch pan will yield thinner brownies that bake in about 25-30 minutes, while a smaller pan requires longer baking.